Xastir Configuration
Now that you have Xastir compiled, you need to configure it and get it going.
My setup involves using VNC to view the materials, so I will start our conversation there.
First, we need to make a non-root user account to run Xastir, as it is a very smart idea to not have the root user doing the grunt work of the server. Security is very important, and if the program errors, or someone breaks into your session, at least they will not have root access.
adduser xastir
passwd xastir
Now, as the root user:
cd /usr/local/share/xastir
chown -R xastir.xastir *
Next, start up the vnc server. You will need to switch to your xastir user, so do a su - xastir if you are logged in as root. You will also need to do a vncpasswd to set the password for the VNC connection.
I am using screen 5, which means TCP port 5905.
vncserver -depth 16 :5
You will need to execute the above command every time you restart your linux box, unless you write some sort of script to execute it on startup. Do not just add lines to the /etc/rc.local.... that would start it up under the ROOT user, and that is a security violation!
Note: If your system is behind a firewall, you will need to open up a port on the firewall to access it. Screen 5 maps to port 5905. Screen 10 maps to 5910. You get the idea.
Connect and Configure
Now, on your client computer, start the VNC session to connect to your server on port 5 (or if you chose a different port, use that number). Some software will make you use a colon, such as 192.168.0.15:5 in order to access the proper screen. If you need help with VNC, Google is your friend! On RedHat / CentOS, your VNC X server is TWM, or "The Window Manager", and it is a very simple X screen. But that is what you want -- if you had a full-blown KDE or GNOME session, imagine the resources that you are going to waste just spinning with the graphs. The less you have running in this window, the better.
Move to your VNC session. In the terminal window, type in xastir. If you do not see a terminal window, scoot around the interface to find the option to start a terminal session. You might need to click on the desktop to find xterm.
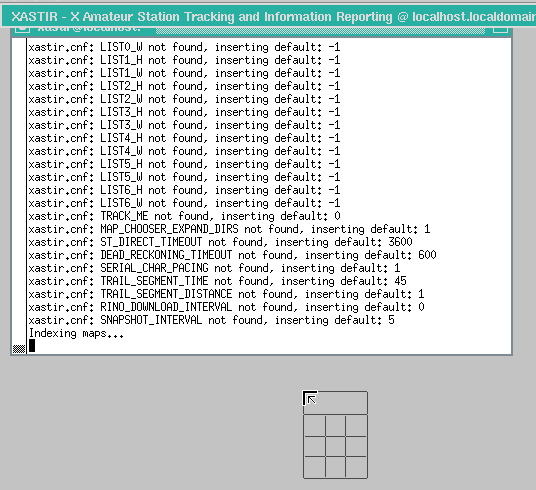
Inside the xterm session, type in xastir. On TWM, on your first time, you will get a little dinky outline. Click, and you will see it fill in. Use the grow box in the upper right-hand corner, drag to make the box bigger and wider. Eventually, you will see the NOCALL screen
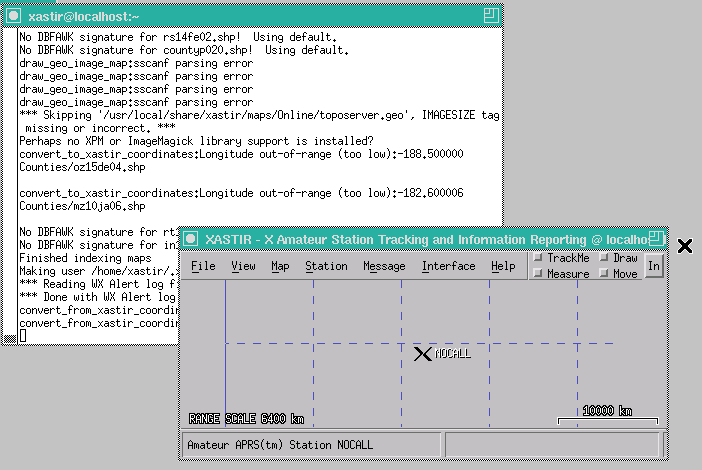
From here, make the window large enough for you to work with it. Use the control in the upper-right hand corner. Select File --> Configure --> Station, and you should see the window below:
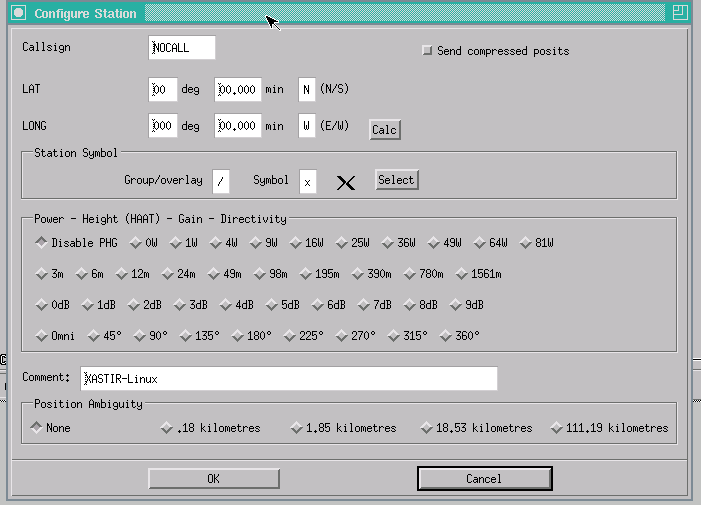
Make your settings as appropariate. If you don't have a ham radio callsign, keep N0CALL inside the window.
Inside the File Menu, go through the Configure --> sub menu, and then save your settings.
Under the Map menu, disable (clear the check / box) "Enable Color Fills" and "Enable Map Grid".
Now, we need to add the maps to Xastir. Go into the Map menu, and choose Map Chooser. You will see a new box. If the "Expand Dirs" option is not selected, then check it. You will see a bunch of files display. Select the following:
* Everything under Counties
* countyp020.shp
* Online/WMSRadar.geo
* After the ridge/ series: roadtr1020.shp & s_14jl05.shp
After the selects, hit the Properties button, and examine this screenshot:
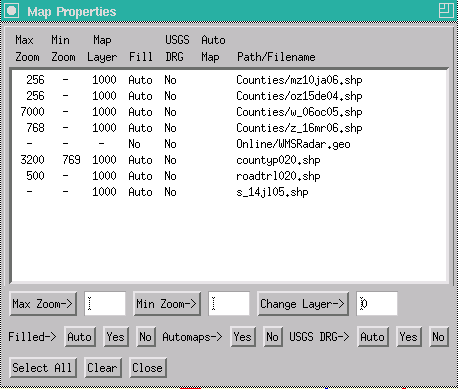
How do you make the changes? Highlight the line that you wish to edit. Then, type in the numbers for the Max Zoom in the white box. Then click on the button, and it will write the value. Do the same for the Min Zoom, and the layers. What do these numbers mean? Say that you are at zoom level 1024. This means that max zoom level < 1024 will not display, such as the County maps at 256. Min zoom level works the opposite: if the level is 1024, and the min zoom is > 1024, such as the countyp020 entry, then it will not display until you are in the right zone to see it. Why is this important? Because if you are looking at a national map, seeing the counties is rather pointless. Everything would be all black. Also, the road names on some of the maps would draw on top of each other... thus the lower numbers for items with words.
When done, hit close, and then OK, and you should see some familiar shapes on the map. If you are at the default zoom, you are "way out there". Select something in the middle, and learn how to zoom in at things. Take note of the Scale of Miles / KM in the lower right hand corner. Be sure to go to the File --> Configure menu, and save your new configuration settings.
Question: What are all the ridge/XXX_XXX.geo files?
They are the local weather radar images that you may use. In the main instruction line, I selected WMSRadar.geo, which is a nice USA-sized graphic of radar data all on one level. But let's say that you wish to look at your regional radar, or perhaps the WMS site is down. The code is simple: Weather Service Office + Radar Image Type. Let's look at my local example:
ridge/GRB_N0R.geo --> Green Bay Base Reflectivity Radar
ridge/GRB_N0S.geo --> Green Bay Storm Storm Relative Radar (the green/red storm velocity)
ridge/GRB_N0V.geo --> Green Bay Base Velocity Radar (green/red base velocity)
ridge/GRB_N0Z.geo --> Green Bay Long-Rage Base Radar
ridge/GRB_N1P.geo --> Green Bay 1 hour total rainfall image (radar estimate)
ridge/GRB_NCR.geo --> Green Bay Composite Radar (composite = summation of activity @ all layers sampled)
ridge/GRB_NTP.geo --> Green Bay Storm Total Rainfall image (radar estimate)
For my personal use, I use the GRB_N0R image, as it is the base storm reflectivity, or common radar image. It is the level where you will observe the tornado hooks.
If you want more information on what these files are, visit:
http://www.srh.noaa.gov/jetstream/remote/doppler.htm
Updating the Maps
The radar images are set to update every 7 minutes or so, but if you think you missed an update, you can zoom to any part of the map, and that will force a radar reload. But you want other things on the map, so let's configure the interface to pull non-graphical information, such as warnings, off the internet.
Click on Interface, and you will see an area called Interface Control. Click on Add. Add an Internet Server. Make sure that the checkbox to activate on startup is checked, and disable Transmitting.
Taken from the Xastir Wiki: Browse "http://www.aprs2.net/" to find a reasonable set of servers to start with. Another possibility is to use "rotate.aprs2.net" port 14580, which theoretically should rotate among the available second-tier servers. See "http://www.aprs2.net" for more info. You'll need to put in a filter string, such as "r/35/-106/500" which shows you stations that are within 500km of 35dN/106dW
I honestly do not remember how I generated my pass-code. I am a licensed ham, and I know I had to do something with my callsign, but honestly, I do not remember what I did.
For my Filter Parameters, I use the following settings:
* Activate on Startup Enabled
* Allow Transmitting Disabled (unchecked)
* Host: first.aprs.net Port: 2323
* Filter Parameters -s//a/W -s//a/D -s//? t/n -b/CW* -b/WX*
* Reconnect on NET Failure Enabled
My settings are quite strict: I only want to see the radar, some roads, and the weather alerts. My settings do not show me the trucks and other APRS information.
Filtering the Traffic
Now, once you click on close, you should start to see some activity. Stations should start popping up all over the place, along with message boxes. There could be a lot of stuff there, especially for a metro area like Chicago. I don't like seeing all the icons and stuff on the map, so I do some filtering to clean up the map. I want to see a radar, not a pile of lights!
Under Station --> Filter Data
...... uncheck "Select Fixed Stations", "Select Moving Stations", "Select WX Stations"
Under Station --> Filter Display
...... uncheck "Display Callsign", "Display Trail", and "Display Aloha Circle"
...... uncheck "Enable Dead-Reckoning"
This will clear off most of the station "noise" (remember, I am looking for radar and counties, not where APRS stations are), but some will make it through the filters. If you make it more limited, you risk preventing the watch & warning boxes from dispalying. Save your Configuration!
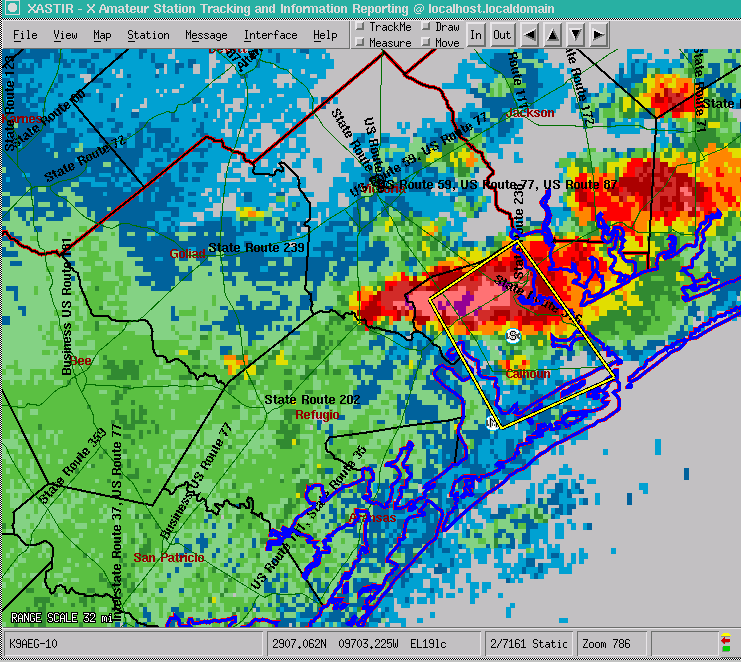
Here is a sample image, with a Severe Thunderstorm Warning:
With that, Congrats! You have a functioning Xastir system!